FX for Rap Vocals

Hey!

I’ve just responded to a forum post on Audiofanzine.fr where the guy was completely desperate about mixing his rap vocals (http://fr.audiofanzine.com/techniques-du-son/forums/t.537530,au-secours-s-v-p,post.7463643.html) The guy didn’t have bad gear, not at all in fact. He has a Neumann microphone, a very decent preamp, but couldn’t get a good sound out of it.

As I always says, gear by itself is not making things sounding better, sound engineers do.

Having mixed rap vocals for a while now, the answer seems very clear to my mind. But, I have to remember to myself that it is far from being trivial at all. So, since he might not be the first one to struggle with it, and you might not speak french, I decided to post an equivalent answer here:

Here are some guidelines from which you can start, and then tweak for your specific case:

Compression:

First, rap vocals are recorded relatively close to the microphones, in order to get the “proximity effect” that is usually unwanted for vocals.

Rap vocals need strong RMS-based compression. For this, I would go with an opto compressor (such as La-2a or tubetech CL-1B, free plugin: ThrillseekerLA available on Variety of sound http://varietyofsound.wordpress.com/2012/03/02/thrillseekerla-released-today/). Apply a 4-5 db of gain reduction at a ratio of 3:1. Here again, we’re trying to accentuate the feeling of proximity of the voice.

Equalization:
Low cut: 100Hz
-2db at 800Hz
+ 1-2db at 1.2kHz
high shelf + 1-2 db starting at 4kHz.

This equalization will make sure to remove the muddy noise of voice (800, under 100) while bringing some shine to it (1.2kHz, 4kHz).

If your compressor is not an emulation, it can also be interesting to add an exciter to the chain, but make sure it is subtle (enhancing, not degrading).

As I mentioned, those are guidelines, you might need to tweak them a bit to perfectly suit your needs. Interestingly, those settings are very similar to what I would use on pretty much any kind of vocal, except, of course,  the close miking technique.

Good luck with that, my friends,


Chris

Answers to rhuobhe’s question

The following question has been asked under the “how to adjust compressor settings (part 1)” post:

I have a question for you if you don’t mind. I seem to fail at squashing peaks with high ratio/high threshold because the compressors i’ve tried won’t have fast enough attack times so the peaks partially go through and they end up eating my headroom (unless I use a limiter and that feels like cheating). Am I doing something wrong?

Hello Rhuobhe’s, thank you very much for your participation. I don’t mind, I encourage it ! It seem to me that the compressor you’re using is either not set properly or simply not the appropriate one for your application. Let me explain:

  • Like you have said, yes it’s possible that the attack time is not fast enough. I suggest you to read the blogpost about adjusting attack and release time on compressors that is a bit more recent that the one you posted your comment. If you can set the attack time faster on your compressor, is it solving the problem ?
  • If not, it is definitely possible that the compressor you’re using is simply not the good one. There is a subject that I’ve not covered yet on compressor: Peak/RMS detection. Before taking a decision, the compressor analyze the signal. The way the signal is interpreted has a HUGE influence on how the compressor will sound. RMS detection take into account the area under the curve a certain amount of time before  (averaged value) while the peak is simply taking into account the actual position (instantaneous value).  For signal with dangerous dynamic that might cutoff your headroom, peak detection might be the right choice.
  • About that, compressors are often based on RMS detection (smoother response) and limiter on peak detection. In my case, I think the best is to have the choice. Compressor RMS-detection-based will sound good on vocals, but not necessarily on high dynamic content. That can be also the reason why we have the impression sometimes that a cheaper compressor is better that an expensive one for some application.
  • There is nothing bad using “limiter” if it’s not a maximizer or a hardclipper. A lot of compressor, like VOF Density for example, that let you select between LIM or COMP. In that case, Limiting has nothing to do with maximizer. Those limiters often have a ratio of about 10:1, which  is not clipping. Try to avoid the use of maximizer or hard clipping.
  • I think, in your case, the best will be a peak-detection compressor. Set at near-zero attack setting, it will compress.  If you don’t have one, I can program a simple one for you.

I hope this answered to your question. Please, do not hesitate if you have other questions.

Sincerly,

Chris

Adjusting attack and release settings on compressors [tutorial]

Last week, I talked a bit about the intimate relationship between the threshold and the ratio. It seemed pretty straightforward, and it was. However, this week, we are going to investigate more deeply parameters that still seem misunderstood, even for sound engineers. Of course, attack and release times are less obvious to the human ear than distorsion, for example.

Why attack and release time matter ?

Attack and release times play an important role in the quality of compression [Zolzer, 2008]. It is true that attack and release set to zero will distort more easily. Also,  in that case, the  compressor doesn’t care about the feeling transported by the waveform; Mechanically, it will simply chop off everything by half (for ratio 2:1) that will trespass the threshold. Like Bootsie said, “the magic is where the transient happens” [Variety of Sound, 2009], if true, which is, therefore it cannot be systematically cutoff whatever it is supposed to express. For those who don’t know what transients are, let’s say peaks.

What are the challenges one might face while adjusting these parameters ?

First, monitoring and acoustics will play important roles on those adjustment. The fidelity of the speaker will play on the attack time, while the acoustic of a room will play on the perception of release time. Why so that ? Let’s go deeper into that:

The attack felt is directly proportional to the ability of the woofer to reproduce the dynamic. If you’re woofer is made of heavy materials like cardboard, the speaker will respond slowly compared to the one made of kevlar. In other words, if the dynamic of the speaker is slower than your attack setting, you won’t hear any difference.

The release time is hard to hear if you room is very echoic. Why is that ? Because the reverb of your room consists of an amalgam of delayed sound. Therefore, more the reverb level is close to direct sound in terms of power, more you brain will take into account of past events rather than instanteneous ones. It is then a fact that dead environment is better than a live environment for compression release setting.

Theoretical background

First, what are the attack and release time ?

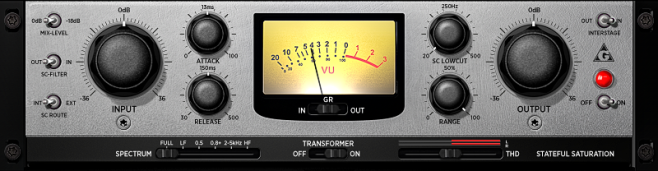
Attack time is the time it takes to the compressor before reaching the gain reduction it should apply once the threshold trespassed. Similarly, the release time is the time the compressor will continue to apply the gain reduction after the signal get back under the threshold.

Where is that coming from ?

The attack and release time are originally coming from the analog domain. Since feedback designs were used, the gain reduction applied by the compression was based on the information that came in few milliseconds before. It’s funny to see in the Altec 436 manual, which has fixed attack time of 50ms was considered as a “fast attack” compressor. Nowaday, it would be considered as slow.

How to adjust them ?

Attack time:

I usually start by setting the attack time first since in many compressor design, the release time is function of the attack time. When listening to the effect, you have to focus your attention on the beginning of the peaks. While a zero attack will brickwall the peak, a little longer attack will let it pass a bit. Now it’s a question of taste which also depends on the particular situation.  But, a lot of people like to let pass the attack of high dynamic instruments. For drums as an example, letting the attack pass a bit before compression helps to make the compression more transparent, since the hear still feel the punch in the dynamic even if the rest of the curve is compressed. Voice also gains in having long attack time, since the consonants can pass a bit like percussive sounds. On the opposite side, some sounds like slapping bass, with over exagerated slapping noise will gain in being entirely compressed. Same thing when trying to deess (remove harsh “sss” sound in a voice). In other word, if the impact is desirable: go with a longer-than-zero attack time. If not, if the impact is annoying: cut it straight away with near zero attack time.

Release time:

Release time is often used to minimize audible distorsion. The distorsion phenomenon occurs when is squared by the threshold almost like clipping. This occurs since the samples just under the threshold have almost the same values as the one just above and the ear interprets it as if it was a continuous square wave. By adding a release time, we are pushing the data close to the threshold a bit away, so the ear doesn’t hear it at the volume.

So, according to that explanation, when release time is needed ?? Long release time is particularly needed when the overall volume is close to the threshold. Otherwise, if it is an almost instantaneous huge peak and the rest is really quiet, a very quick attack time would do the job without pumping artifacts. Longer release time than required will translate into pumping effect, which is, in most of the cases, undesirable.

To conclude, I hope this article has been  exhaustive enough, please do not hesitate to leave your comments or share your ideas. You can like the www.quantum-music.ca facebook page or subscribe to the RSS flux to get news feeds.


How to make your vocals shine! (Part 1)

The importance of vocals

Except for instrumental music, vocals are the most prominent instrument of a mix. Some engineers say that if you’ve got the vocals right, you’ve got the mix right. Also, the term “song” would be inappropriate if the point wasn’t about “singing”. Interesting fact, the human ear is way more critical in about vocals than any other instrument. The reason is fairly simple, it’s the only instrument that everyone plays everyday. Futhermore, the human has a deeper feeling towards another human rather than any object. That’s the very same reason why they show human faces in product advertisements. Another interesting aspect of vocals is the lyrics. Currently, the vocals is still the only instrument that can put words on a song. This adds an other dimension to a song.

Enough talk, more tricks!

First thing first:

  1. Have a great song
  2. Have great lyrics
  3. Record it right: The performance must be flawless first.
Once you’ve got that, now we can talk about investing time in a proper mix. Every engineer has their own tricks, but this is a very good recipe: the optimal Vocal mixing algorithm.
  1. Cutting filters
  2. Compressor/De-esser
  3. Equalizer
  4. Exciter
  5. Spatial effects (Delays & Reverbs)

1. CUTTING FILTERS

Why ?

The best way to start is by removing unwanted frequencies and resonances. This will help to make the vocal track cut through the mix more easily. The idea here is to cut unwanted frequencies before the compressor and boosting others after. The reason why we are doing the equalization in two steps is simply to clean the signal in order to help the compressor doing it’s job.

How ?

First, start by removing everything under ~100 Hz and above ~20kHz (Of course, the cutting frequencies will depend of the singer, use you judgement). There are good chances you can also use a peak filter to cut around 700-800 Hz by few dB in order to remove nasal resonances. A good free equalizer to do this job would be the 1982art Gloria reviewed early on this very same blog.

1982Art – Gloria

That’s enough for this time. See you soon for the following…

What is mixing ? (part 3)

The third part of this subject is based on stereo. Historically, the stereo recording has been invented in the 40s and I’ve been relatively rapidly applied to the music in the 50s. We probably all remember crazy recordings from the beatles (or whoever else of that time) in which the vocals are on a side and the rest of the band is on the other. Without falling into those extremistic approach, it is important to find an appropriate stereo balance that fits the song.

MONO VS STEREO

First, it is important to understand that it is not everything that has to be stereo wide. If stereo is atmospheric, don’t forget that mono is punchy. If you listen to hip hop/rap records, you will notice that most of the record is mono. It is simply because they want it to punch to its maximum. Something too wide will usually sound too soft or not enough focused. That’s why it is important to find a balance between those two extremes.

MONO LOWS and WIDE HIGHS LAW

Well, it is not a law. Let’s say that it is a very strong tendancy that consists to “mono” (yes, “to mono” as a verb!) the low frequency and wide the high frequencies. The way you make the transition between, if linearly or exponentially, is a question of taste, but that’s a good start. Let’s say that human hears like high frequencies to be wide spread and bass to be focused and loud. For the rest, it is yours to experiment and decide what fit most your music genre.

What is mixing ? (part 2)

audio-compression

As mentioned in the previous topic about “What is mixing ? (part 1)”, we defined the mix as a three dimensional world :

  1. Frequency
  2. Dynamic
  3. Stereo

Of course, like in the real world, we can also take into account the time as the fourth dimension, which is absolutely right. But for now, let us focus mainly on the three first ones. Since the frequency dimension has already been covered in the previous section, let us now move on to the dynamic aspect of mixing.

For some of us, in mastering, dynamic is everything… But from a mixing perspective, what does that mean ? Well, it is fairly simple: Some instruments are more dense than others, so they need to be compressed in order to be “competitive” in the mix. Some people (a lot actually) just compress everything to the maximum in the hope that it will sound crazy loud. Well, if it sounds loud, don’t expect me to believe that it sounds right, or either close to be good.

Honestly, if you want it to sound loud, ask your mastering engineer. This blogpost will encourage you to focus on relative dynamic rather that absolute dynamic (or loudness). What I mean by that is that you should make sure that the dynamic between your instruments is making sense, no matter what the dynamic of the whole song is.

That said, as a rule of thumb, start by simply compressing elements that are not dense enough to compete with others. A convenient example of that is vocals compared to brass. The compressor has not been invented to kill the dynamic, but simply to blend the instruments together. Keep that in mind and your mixes will sound better, I promise.


What is Mixing ? (part 1)

What is Mixing (part 1)

/blog/wp-content/uploads/2012/05/11.png


Mixing is the process which consists to blend the different instruments together in a homogeneous song. While most of people don’t even know this process exists, the mixing step can arguably be the step that takes the most of your time. In order to explain properly the main concepts, we explore the sound mixing world in 3 parts, which are respectively: Frequency, Dynamics and Stereo.

The first dimension: Frequency

Except for classical music, if you try to blend the instruments together without any treatment, there are big chances that it will simply not work. The main reason is that the frequency ranges of each instrument are overlapping. To give you a better idea, let us compare figure 1 and 2.

 
/blog/wp-content/uploads/2012/05/2.png

Figure 1: Song as recorded before mixing


/blog/wp-content/uploads/2012/05/3.png

Figure 2: Song after mixing

As you can see, the first one is chaotic since instrument is present everywhere in the frequency range while the human ear can only hear one sound at each frequency at a time. In other words, it’s a mess.

But if you look at figure 2, you will see that every instrument has its place and play its role. The kick is not trying to replace the bass, and the snare, the lead guitar, like in a classical orchestra.